Flatlays are the ultimate must-have accessories to every modern-day blogger's Instagram feed. A well placed and professional layout of products - flatlays are the latest strategic marketing tool being used by bloggers and fashion companies alike to subtly promote their product to a wide spread social media audience. If you're an aspiring fashion creative looking to break into this tough industry, having the ability to produce a high-quality flatlay is a great attribute to have and adds one more element to your resume to help you get noticed.
Because of the rising popularity of flatlays (and because I consider myself pretty alright at producing a decent flatlay) I thought it would be a great time for me to share my tips and trick on how to create an eye-catching and professional fashion flatlay.
 |
| Life of A Top Model Whats In My Makeup Bag Shop Til You Drop |
USE NATURAL LIGHTING
My first tip is to always use natural light. Natural light is the most flattering you can capture therefore is the most complimentary to produce a good photo. Personally I take my images on the ground in front of a big window but you could shoot on a table, your bed, anywhere as long as its stable and close to a large amount of natural light. I've found you get the best images when you shoot mid-morning or in the middle of the day as this is when the light is at its brightest. Understandably though, us busy fashionistas are constantly working and it can be difficult to find a time, during daylight, to shoot an array of flatlay photos. My suggestion for overcoming this is to dedicate some time on the weekend to put together your images. For example spend your Sunday morning shooting 3-4 flatlays, bank them up on your phone and your Instagram feed is sweet for the next week.
ALWAYS HAVE A WHITE BACKGROUND
If you are really looking to capture a professional and high-end aesthetic in your flatlays its crucial to use a white background. Using white allows the focus to be solely on your products and your well thought out placement. It ensures the products and their labels aren't washed out by a background of similar colours and captures the true shapes of the products used. White also creates a flattering contrast and allows the vibrancy of your products to shine. To create a white background use a piece of white cardboard, a white bedspread, sheets or if you're lucky enough to have access to a studio you could use a studio paper roll.
 |
| Alexander McQueen Summer Essentials |
 |
| MBFWA Urban Decay Launch Electrify Mag Launch |
CREATE A THEME/MOOD
Creating a mood or theme for your flatlay gives you a concept or idea to work with when compiling products to feature in your flatlay. A theme could be anything from "current fashion favourites" or "Mercedes Benz Fashion Week" to "fitness" or "travel". It can be broad or it can be extremely niche, its entirely up to you, as long as you have an idea to work with you will be able to find and put together an array of products that compliment each other. It is important to keep in mind that you don't have to strictly use products that instantly scream the words of your theme. Be creative and think outside of the box - using products that still have a slight attachment to the key words but are not something you would instantly think of. For example when putting together a flatlay for "fitness" you don't necessarily have to include a plate of salad or a photo of your gym membership. Think beyond these generic items and include your new pair of Nikes, your workout gear or magazine images of fitness gurus who are your ultimate inspiration.
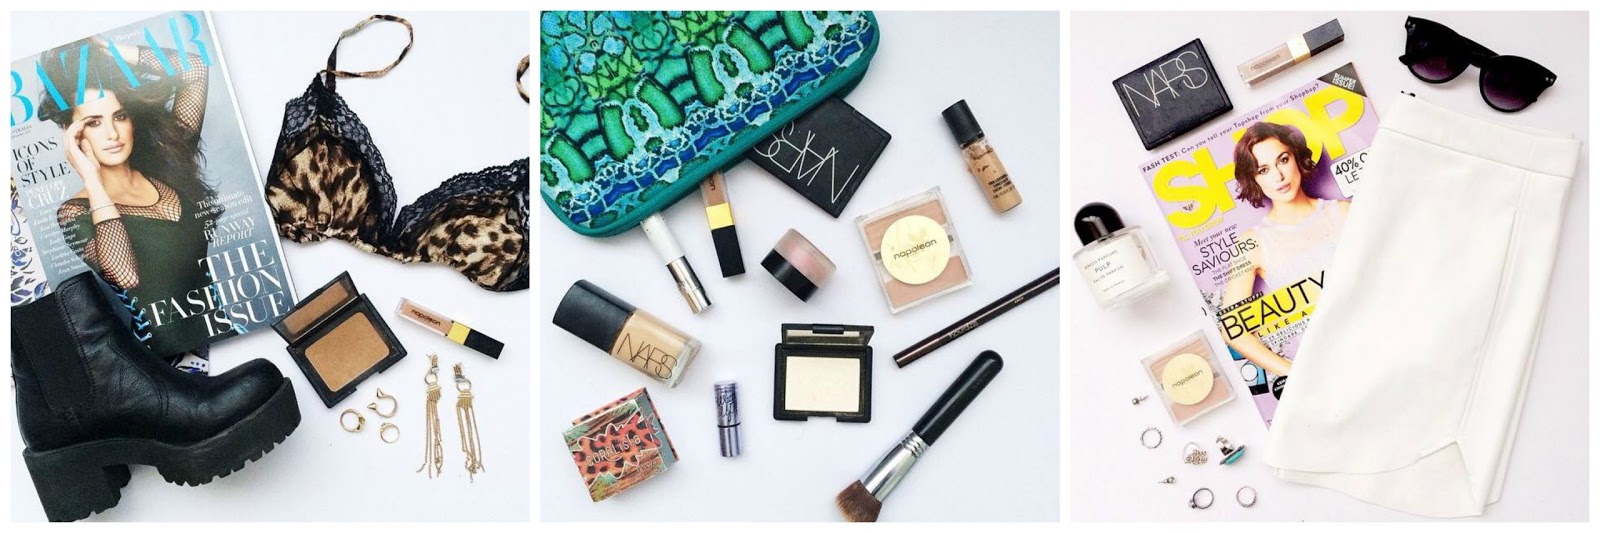
SHOWCASE AN ARRAY OF PRODUCTS
Flatlays aren't all about fashion or beauty products, its an opportunity to share your all-time favourite purchases or products of the moment with your viewers and showcase a variety of different brands. Its important to use an array of items to create a mood and showcase your personality through your images. You can use anything you like in your flatlays from clothing to beauty items, accessories, food, travel items etc. The key is that you place the items you choose strategically and use the products to tell a story. To add depth and personality to your image its important to place your products in different and intriguing ways. For example some bloggers strictly place their products symmetrically and in-line with each other while others will always have their products on a diagonal. Personally I like to use a combination of symmetrical and asymmetrical lines to place my products and create interest at a number of different points throughout the image.
CAPTURE WITH A GOOD CAMERA
Using a good camera is a crucial element in capturing a professional flatlay image. Taking your photos with a clear and advanced camera will enhance the quality and resolution of your images as well as allow the true colours and shapes of your featured products to shine through. Personally the term "good camera" I consider as either a professional DSLR such as a Nikon of Canon or the camera in-built to one of the latest models of a smart phone e.g the iPhone 6 or the latest Samsung. Its also important to note that you should never use flash. In the past I have only found flash to create more shadows to your flatlays and take away the raw and natural element we create with natural light.
 |
| Purple Day Breast Cancer Awareness |
TAKE TIME TO EDIT IMAGES
Lastly but probably the most importantly it is essential to edit your flatlay photos before upload. Editing flatlays should only be used to enhance the colour and light captured during your shoot and intensify the quality of the image. I also use this editing time to crop my photos. Personally I think flatlays are the most flattering when cropped to a square as it allows the whole image to be filled with product and the labels to be read clearly. It also increases the professionalism of the image. You can achieve a square flatlay by either cropping the photo taken with your DSLR camera or you could simply take a square image of your flatlay with your smart phone. When editing the elements of a flatlay I always like to enhance the contrast and brightness to create the illusion the background is a very stark white and sometimes, depending on the image, I will enhance the saturation and sharpness to emphasise the vibrancy of colours and reveal the true and raw shapes of the featured products.
 |
| High Fashion: Fashion Flatlays - all images used are my own. |
So there you have it, those are my top tips and tricks to producing a professional and high-quality fashion flatlay. Getting it right the first time can be a little tricky and sometimes frustrating when the images don't come out how you want them to, but just take your time and strategically edit and the final product will come together.
For more fashion flatlay inspo head over to Instagram and follow @flatlaystyle and @flatlays for some amazingly creative images.